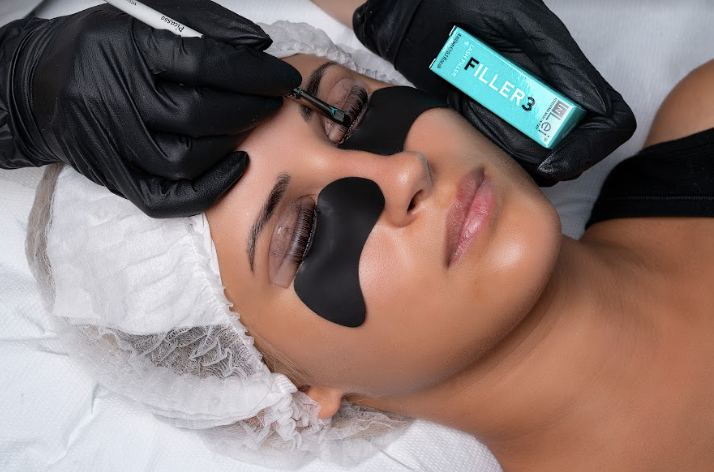
Are you looking to achieve the perfect lash lift? Well, look no further! In this blog post we will outline our nine tips to getting lashes onto the rod perfectly. By following these simple tips, you'll be on your way to achieving fabulous lash lift results in no time! Stay tuned for more information on how to get the most out of your lash lift treatment. Thanks for reading!
9 Tips For Lifting Lashes Onto The Rod Perfectly:
If you're anything like me, you're always looking for ways to improve your lash lift results. I'm happy to report that there are a few simple tips and tricks that can help take your lash lift game to the next level!
- Always Glue to Eyelid
- Leave 1mm
- Leave Lashes Out
- Symmetric Placement
- Inner to Outer Corner
- Natural Order
- Parallel Placement
- Straight Tips
- 90 Degrees
Keep reading to learn what our experts at InLei have to say about getting lashes onto the rod perfectly.
Rule #1 - Always Glue to Shield Eyelid
It's crucial that you glue the shield to the eyelid in order to achieve the perfect lash lift. This will ensure that the lashes are in the correct position and provide the best results.
Make sure the adhesive is applied evenly and wait until it dries completely before proceeding with the next step.
Shop the best glue and shields with My Absolute Beauty.
Rule #2 - Leave 1mm
A 1mm gap must be maintained between the shield and the root of the lashes. The shield should never be pushing down on the root of the lash. This will help to achieve the desired curl and prevent damage to the lashes.
Rule #3 - Leave Lashes Out
Any lashes that are above the lash line (the rogue growing ones) must be placed underneath the shield and not included in the curl process. This will help to achieve a more uniform curl and prevent the lashes from becoming too curly.
Rule #4 - Symmetric Placement
Shields must be positioned symmetrically on both eyes with respect to the nose.
When placing the shields on your eyelids, it's important that they are symmetrical in order to create a balanced lift. If one side is off centered, it can cause uneven results. So be sure to take your time in order to get it right.
Tip: Use a mirror to help ensure symmetry when applying the shields.
Rule #5 - Inner to Outer Corner
Every lash must be placed on the shield from the inner to the outer corner. Every lash must make contact with the shield to ensure optimal results.
When placing the shields, it's important to place them in such a way that they follow the natural curvature of your eyelids. This will help to create a more flattering lash lift and avoid any harsh lines.
Rule #6 - Natural Order
All eyelashes are lifted perfectly respective of natural layers. In instances where clients have rows of lashes on top of lashes, the ones that are not so high that they must be placed under the shield must be applied to the shield in order so that the end result creates one straight row of lashes glued to the shield.
The lashes should be placed in their natural order in order to create a more seamless lift. This will help to avoid any awkward looking gaps in between the lashes.
Rule #7 - Parallel Placement
The eyelashes must be placed parallel to each other on the shield. No criss-crossing!
The lashes should be placed in parallel lines in order to achieve even results. If they are not parallel, lashes will look skewed and uneven.
Tip: Use this eyelash helper tool to effortlessly place lashes parallel on the shield.

Rule #8 - Straight Tips
Tips of the lashes should be positioned carefully to ensure there are no bent tips. Avoid the accidental spread of perming solutions onto the tips of the lash.
It is important to get the right sized shield so that your curl does not look overdone. Too small of a shield creates too small of a curl for the lash.
Rule #9 - 90 Degrees
The lashes must be placed on the shield in an absolutely symmetrical manner. (90 degrees or straight up on the shield). Do not allow the lashes to fan out onto the shield.
The lashes should be placed at a 90 degree angle to the rod in order to achieve the perfect curl. If it is not at this angle, the finished result will be rough and distorted.
Bonus Tip: Use InLei Lash Filler

Inlei Lash Lift (Filler) is the perfect way to achieve dramatic and long-lasting results. With just a few simple steps, you can achieve fabulous lashes that will last for weeks!
Amazing Lash Lift Results
By following these simple tips, you'll be on your way to achieving fabulous lash lift results in no time! Stay tuned for more information on how to get the most out of your lash lift treatment. Thanks for reading!
Spread Your Knowledge
Do you have any other tips for getting the perfect lash lift? We'd love to hear from you in the comments below!
Shop & Save
Are you ready to try out InLei Lash Filler? Score 10% off with code SPECIAL10 at checkout. What are you waiting for? Fabulous results await! Click here to shop now.


